If you’re anything like me, you’ve struggled with drawing in perspective, and you’re looking to find better ways to learn perspective drawing in different scenarios. Sometimes, you can know the rules of perspective drawing and still need help applying them. I recently stumbled upon the 39 pictures you’ll see below by illustrator and animator Thomas Romain, who teaches with very easy-to-understand diagrams how to draw in perspective.
“Drawing is like filming the inside of your mind.” -Thomas Romain
In 2015, Romain posted all of these drawings on his public Twitter account, @ThomasinTokyo, to help people improve their drawings. These perspective drawing lessons are the best practical guides I’ve seen, and they will help you draw any concept or scene in no time. Use these as starting points and practice guides to get you to begin drawing architectural spaces with ease.
Who is Thomas Romain?
Thomas Romain is a French animator responsible for creating Code Lyoko alongside Tania Palumbo. He is also responsible for designing and co-directing the Franco-Japanese animated series Ōban Star-Racers, which started his career in Japan.
In early 2017, Romain attracted mainstream media attention when he began tweeting illustrations he had drawn based on his children’s sketches, which eventually became his Family Traits book. You can purchase it here. Thomas also published another book in 2015 entitled Lost in Anime.
How to Draw in Perspective: 30+ Perspective Drawing Lessons By Illustrator Thomas Romain Share on XPerspective Drawing Lessons: Learn How to Draw in Perspective

 Drawing by Thomas Romain
Lessons on Eye Level in Perspective Drawing
1) Trace the eye level.
The first thing Thomas does when starting a drawing is to trace the eye level. It is essential because it defines the height at which you draw your scene.
2) Practice on random photos.
Thomas took three pictures of the same street with different eye-level heights. Tracing eye level (and vanishing points) on random images is a good exercise. It helps you understand this concept.
3) Use your eye level as a guide to how objects will appear.
Everything you draw from above the eye level will appear as seen from below. Everything you draw from below the eye level will appear as seen from above. Your beloved vanishing points will be on the eye level, not necessarily in the middle. The closer your objects are to eye level, the more their horizontal plans appear thin. The plan may become a line. Don’t be afraid of that. It happens to everyone.
4) Choose your eye level based on what you want to show.
Choose your eye level smartly according to what you want to show. Thomas uses a high eye level to show the room’s global layout. Thomas uses a low eye level when he wants to show the ceiling.
Lessons on Eye Level Height in Perspective Drawing
1) When the eye level is in the middle, vertical lines are parallel.
Thomas shows you the height of the eye level in your frame influences the global perspective of your layout. All the vertical lines are parallel when the eye level is in the middle of the frame.
2) When the eye level is low, the converging point changes upward.
If the eye level goes down in the frame, all the vertical lines will start converging to a new converging point, upward and far away. Refrain from drawing it since it’s so far. Instead, use a perspective guide to help you.
3) When the eye level is high, the converging point changes downward.
On the contrary, if the eye level goes up, all of the vertical lines will converge to another converging point downward. If you play a lot of FPS (frames per second), you are familiar with that.
4) Learn the rules of perspective before you break them.
In summary, if the eye line is in the middle of the frame, vertical lines appear parallel. The more you trace the eye level far from the center of the frame, the more the vertical lines will converge faster to the new converging point. According to the perspective rules, you can not make your vertical lines on abnormal slants in a realistic environment. However, it can look cool in cartoon stuff, which is the beauty of animation since everything is possible—Thomas’ advice, though: Learn the rules before you break them.
Lessons on Drawing People at the Correct Size
1) When the eye level is slightly taller than an average person, you can check your character’s height in relation to the eye level.
Here is a tip to help you draw your characters at the correct size anywhere in your scene. When the eye level height is slightly taller than the height of an average person, you can draw a silhouette and check how it is related to the eye level height.
2) Duplicate your silhouettes and place them so that the eye level is always crossing the character at the same height.
Now, you can duplicate your silhouette, move it in your picture, and adjust its size (Photoshop’s transformation tool) so that the eye level is always “crossing” the character at the same height, this time slightly above it.
3) When eye level is neck height, it’s good to determine the size of someone partially off-screen.
When the eye level is at the height of the neck, it is beneficial to determine the height and size of a partially off-screen character.
4) Try drawing your eye level at knee height to train your eye.
Also, try drawing a scene where the eye level is at the height of a person’s knees to train yourself.
Lessons on Drawing and Choosing the Correct Lens
1) The same place will appear completely different depending on the lens you choose.
The same place will appear completely different depending on the lens you choose. Even though we are accustomed to seeing these kinds of images, layouts drawn with a wide-angle lens can not naturally be seen by the human eye. The perspective effect is powerful. Layouts with a standard lens look natural, while layouts with a telephoto lens are like the image has been zoomed in. All the perspective lines are almost parallel. Note that Thomas drew all three layouts from the same distance. He did not move closer to the building.
2) There are many ways to draw the same set depending on the feeling you want to communicate to the audience.
What happens when you get closer to the subject and change the lens? Thomas shows all three lens choices again; this time, he is closer to the subject. He showcases many ways to draw the same set depending on the feeling you want to communicate to the audience.
3) Understand where your frame will be located depending on the lens you use.
If you are using perspective guides, which Thomas highly recommends, he showcases examples of where your frame will be located depending on the type of lens you are using.
4) Then look at the results of what you will see and how you will see the image using the perspective guides with all three lens choices.
Thomas showcases the results of what you will see and how you will see the image using the perspective guides with all three lens choices he showed in the previous slide.
Lessons on Drawing Street Slopes
1) Beginners make a crucial mistake when drawing streets.
Something to remember when drawing a street: Thomas showcases a drawing that doesn’t feel quite right but is technically drawn correctly in perspective. However, it doesn’t feel natural and could be better. He has made a mistake every beginner does at first.
2) Identifiable features look wide when seen in elevation view.
The windows and other identifiable features are too wide when you look at the image in elevation view.
3) To correct this, increase the number of houses and make the windows and doors thinner.
To correct the mistakes of the first layout, Thomas increases the number of houses and makes the windows and doors thinner.
4) You can take it further by drawing the windows and doors even thinner as slits.
To push it further, Thomas draws the windows as slits. To correct the mistakes of the first layout, Thomas increases the number of houses, makes the windows and doors thinner, and creates an eye-catching background in a foreign labyrinth.
5) There is a trick to drawing street slopes in perspective.
Thomas noticed that some people have difficulty drawing street slopes, which is sad since slopes always look more attractive on screen. Thomas shows how a flat street looks in perspective.
6) For a street going uphill, you’ll need to add a second vanishing point right above the first one at eye level.
For a street going uphill, you must add a second vanishing point above the first. Don’t draw it too far, though. You will use it to draw the road or the ground and determine how the houses are lined up. Of course, all of the horizontal parts (the roofs, windows, and doors) are still converging towards the first point at eye level.
7) Do the same thing with a street going downhill, but this time, the vanishing point will be under eye level.
Do the same thing with a street going downhill, but this time, the vanishing point will be under eye level. Remember to draw the distant background at eye level. The eye level equals the horizon.
Lessons on Drawing Cars in Perspective
1) It is easier to think in 2D at first before drawing in perspective.
Thomas shows an example of something he had to draw for the show Cannon Busters. Thomas needed to become more familiar with cars, so he gathered research images and thought first in 2D elevation of the front and side views. Thomas finds it much easier to think about the image using only two dimensions at first. He tried to make the two elevation views match as much as possible while trying to get an exciting silhouette.
2) Once you are satisfied with your 2D design, put it into perspective.
Once you’re satisfied with your 2D design, put it into perspective. Use a perspective grid and the Photoshop transformation tool. Be nice to your brain and use different colours for each axis. This will make an excellent base to work with.
3) By getting spatial information from your 2D views, you can build your 3D shape.
By getting spatial information from your 2D views, you can build your 3D shape. This part can be tricky for beginners, though. The car’s horns are the hardest to draw in volume, but the side of the vehicle will remain almost the same from the 2D version, making it easier to draw.
4) Add colour and dimension to your final drawing.
Thomas shows the final results with some fancy colours in his full 3D version.
Lessons on Drawing Clouds
1) Smaller clouds with flat shadows should appear near the horizon, and big clouds should be above us.
A few drawing tips about clouds: Smaller clouds with flat shadows should be near the horizon. Bigger clouds with shadows underneath should be above our heads. Thomas shows a naive way to draw clouds, except clouds are not flat. Clouds must follow perspective rules as well.
2) The composition of the sky matters.
The composition of the sky matters. You do not want your sky to appear regular and dull. It would be best if you always tried to apply more contrast so the sky seems more dynamic. The second image Thomas shows is more contrasted and exciting.
3) Remember that clouds cast shadows.
Don’t forget that clouds cast shadows. It can help you greatly when you draw large scale pictures. It adds depth and contrast. It can make your picture look awesome.
4) Clouds are your allies.
Clouds are your allies. When used smartly, the white surface of the clouds can help you make your pictures catchier and add contrast to your colour selection.
Lessons on Casting Shadows in Perspective Drawing
1) Regardless of where the light comes from, shadows cast by vertical elements on vertical surfaces are always vertical.
Sometimes, Thomas notices other people’s drawings that abnormally skew their shadows and light sources. While this can work for a stylish cartoon project, it’s unrealistic. The only case in which you see tilted shadows is when the surface of the cast shadows are tilted themselves. Regardless of where the light comes from, cast shadows of vertical elements on vertical surfaces are always vertical.
2) Shadows do not come from a weird dimension, so the classic perspective rules apply.
Shadows do not come from a weird dimension. The classic perspective rules apply to them. It isn’t easy to draw them accurately, but they must be believable enough. Thomas showcases a shadow he created with the handy Photoshop transformation tool.
3) Before using colour, shadows will help you describe the time of day and help give your drawing its mood.
Even before using colour, shadows will help you describe the time of day and help give your drawing its mood. Around noon, the shadows cast will be minimal. Classic shadows are usually of a medium size. Early in the morning or the afternoon, the shadows grow substantially. Just after sunset or before dusk, shadows will overtake your drawing, and the sunlight will only reach the tallest parts of the drawing.
4) Remember, you can create cast shadows of off-screen elements as well.
Cast shadows can bring information and contribute even more to the atmosphere of your frame or shot. On the show Basquash!, Thomas used a lot of cast shadows of water tanks and palm trees. Remember, you can create cast shadows of off-screen elements as well. Thomas compares two images of a crosswalk: one with no shadows and one with overbearing shadows. The second one is more interesting and conveys more information.
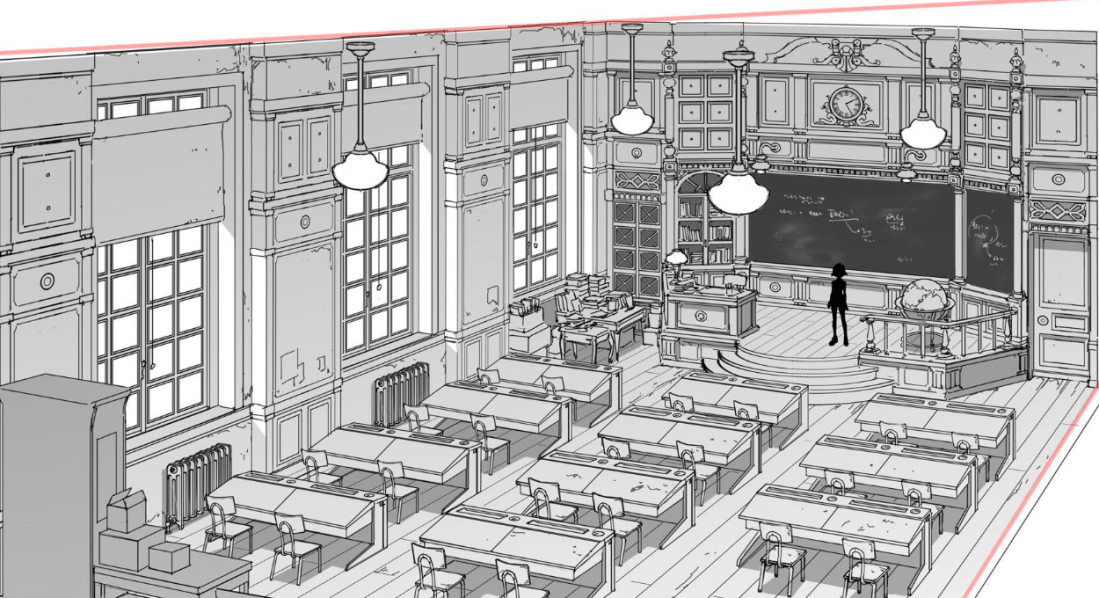
Lessons on Drawing Interiors in Perspective
1) Think in 2D at first.
Think in two-dimensional terms at first. It’s easier. You can also place a human down flat for size reference.
2) Put your idea into perspective.
Then, put your idea into perspective and draw your perspective guidelines.
3) Elevate yourself and the walls.
Then elevate yourself and the walls. Slide your walls upwards and decide what looks correct based on your perspective guidelines.
4) Work hard.
Work hard. Sorry, but you can’t skip this part. It will take a lot of work and practice, but you will become great at drawing in perspective in time.
Did these perspective drawing tips help you better understand perspective drawing and how to draw your concepts in perspective? Let us know your thoughts and perspective drawing tips in the comments below.
For more posts on Art Departmental about art and drawing, click here.
[…] artdepartmental.com/blog/perspecti… […]
[…] https://artdepartmental.com/blog/perspective-drawing-lessons-thomas-romain/ […]